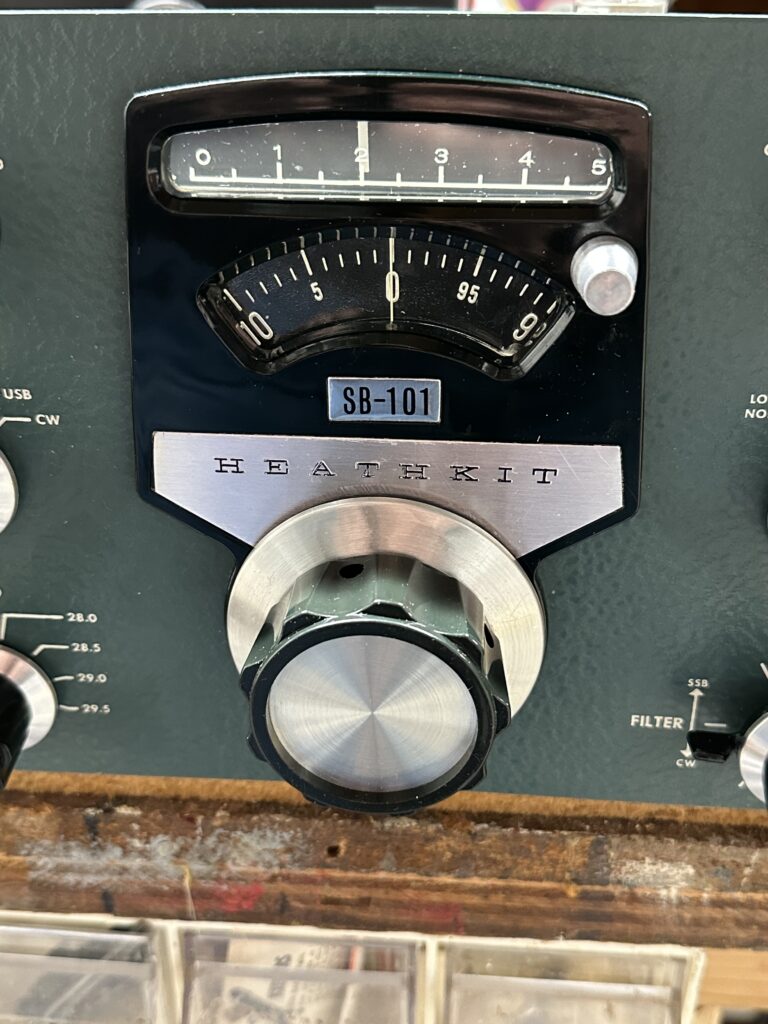
TS-850S attenuator

With the display fixed, I set out to do some alignment and adjustment on the TS-850. One thing I encountered was an issue with the attenuator. The 850 has two front panel buttons to switch in 6 and 12 dB attenuators, or both for 18 dB. One thing I had noticed was that the 6 dB attenuator seemed to work, but any time the 12 dB attenuator was switched in it completely killed the signal. Looking at the schematic, the only thing I could spot as a cause for that would be resistor R3 being open. I decided to pull the RF board and investigate.

With both attenuators off, relays K1 and K2 are both actuated. The signal from the antenna passes through K1 and K2, bypassing resistors R1 and R3. When the 6 dB attenuator is switched on, K1 de-energizes and puts a 6 dB resistive divider (R1/R2) in the signal path. The same method is used for the 12 dB attenuator (R3/4), activated by dropping relay K2.

Once I got the RF board out, the bottom of the board plainly showed that I was not the first one here. Portions of the board underneath the attenuator section were scorched, some SMT resistors were missing, and a 1/4 W resistor was soldered in place of R1. There were signs that some other components were damaged as well. I unsoldered and removed the “rework” resistor and found it to be the wrong value. Oddly, the board doesn’t match the diagrams I found in the service manual I found on line — a couple of the resistors have been replaced with pairs of resistors in parallel. That added some additional challenge to the process as I figured out the changes.

Eventually I found that something had damaged both R1 and R3. I found 1/8 W resistors of the correct values (51 and 150 Ohms – I had 50 and 150, close enough) in my parts stock. With those soldered in place of teh defective SMT parts, I put it all back together and powered the rig back up, and got… nothing. Static. My little Elecraft XG2 signal generator was pushing 50 mV into the antenna jack, and the rig couldn’t hear a thing. I fed the signal directly to L3 and was able to hear it – weakly. So, back out comes the RF board.

Some probing with the DMM found a near dead short (1.4 Ohms) from the tail end of the attenuator at K2 to ground. Obviously that was a problem. Eventually I found capacitor C3, a little 100 pF SMT part, shorted. I removed it from the board and re-tested – now I can clearly hear the signal from the XG2, AND both the 6 and 12 dB attenuators work as they should. I don’t have a replacement for C3, but it’s part of a low-pass filter that I’m not terribly worried about right at the moment. I’ll pick up a 100 pF cap and replace it at my next opportunity. I also don’t know why it failed in the middle of a repair. It obviously wasn’t shorted before I started troubleshooting this issue, as I was able to receive signals off the air. All I can figure is that maybe it was physically damaged but not completely failed, and the probing or heat from the nearby soldering iron did it in. No matter – capacitors are cheap.

Now, on to the next issue — the S meter. It doesn’t “S”. Even with a 50 mV signal, there’s no reading on the meter; I’ll have to go through the alignment steps again to see if I can figure that out. Unfortunately that part of the procedure calls for a more capable signal generator than what I have. I should be able to get in the ballpark with the XG2. The service manual calls for 6 dB and 32 dB – or 1 uV and 40 uV. The XG2 will generate signals on 80, 40, and 20 meters at 1 or 50 uV. I should be able to set the S meter to read pretty close, assuming I don’t run into some OTHER issue that requires ripping the radio apart again.

TS-850 LED display backlight

Note: edited 7/28/25; I refined this by removing one diode and dropping the supply voltage a bit.

A few days ago, I replaced the dim and occasionally flickering CFL backlight from my TS-850 with a length of LED strip light. At first I was pretty happy with it – until the first time I tried to transmit, that is.

To recap, I ran power from the power switch white lead (switched input DC voltage) as I had seen in a couple of Internet posts. I ran that through a total of four 1N4001 diodes in series. The 13.8 V supply voltage really drove the LEDs too bright, and two diodes provided enough voltage drop to make it more reasonable — though as I used it, it became apparent that it really could have used another series diode. The second pair of diodes were bypassed by the display dimmer switch. All well and good; it seemed to work fine.

Then I connected a new power supply thoughtfully provided by a friend (thanks, Dan!), connected a dummy load, and went about setting up the rig for use and testing the power supply’s performance. I set the supply voltage at 13.75 V, and as soon as I started transmitting into the dummy load I noticed that the display would dim quite a bit. In fact, if I set the dimmer switch on (display dimmed) and transmitted, the display would blank entirely. Not good!! It turns out that the white wire on the power switch – well, I don’t know what all is between it and the input; the schematics in the TS-850 service manual are almost impenetrable. Wherever it’s coming from, that line will sag down to 11 V or even lower when the rig is transmitting. Totally unregulated. Obviously I needed a better solution.

It occurred to me that, since I’d replaced the capacitors on the display board, maybe the original backlight would be OK. I re-installed the tube and re-connected the inverter and fired up the transceiver – but the display was pretty dim. After seeing it nice and brightly lit by the LEDs, I wasn’t about to go back to squinting at that. The serial number on my rig indicates it was manufactured in December of 1993; I guess thirty-odd years is a bit of a long time to expect a CCFL backlight to stay healthy. I spent a little time looking for a suitable replacement tube, but aside from not finding one with the right length, I have no idea what voltage is being produced by the inverter – and I’m really not in the mood to screw with it.

After some pondering, I settled on a new approach. I ordered some DC-DC boost converters from our favorite purveyor of just about everything (Amazon). These will take a wide range of input voltage – 2 to 24 V claimed – and convert it to a higher output voltage – 5 to 28 V they say. All I need is to bump the regulated 8 V power up to around 12 V to drive the LED strip. I can adjust the output to get the brightness I like, then switch in the diodes to drop it a little for the dim display setting. These boost converters cost well under a buck each, so I’ll keep a couple around just in case they don’t last as long as I do. I’ll make sure to bag one or two up, along with a replacement LED strip, to go with the transceiver when I (or my heirs) sell it. I’m not going to bother posting a link to the Amazon item because I’m sure in six months it will be a dead link. Just search for “DC-DC step up converter” or similar and sort through until you find a suitable model for you. You could also design one from scratch for extra ham credit.

I designed the circuit below to be as flexible as possible. You don’t need to modify the dimmer switch board; it remains entirely untouched. No soldering to the power switch. All of the wiring is completely on the display board. I happened to have a couple of small SPDT relays with 12 V DC coils on hand, but designed it so that you could use much any relay that has a normally-closed contact (so, SPST-NC or SPDT). These relays can be had dirt cheap. The coil voltage just needs to be 12 V give or take a little; nothing in this whole exercise needs to handle more than maybe 130-150 mA.

About the only inconvenience I ran into is that the DIM switch circuit doesn’t go directly to the CCFL inverter connector, so you’ve got to solder a wire to one of the ribbon cable connector pins. Not a huge deal. No major modifications to the display board are needed, but you will need to cut the small trace that runs from Pin 2 of CN1 (the display dim signal) to one of the SMT resistors in the board. That circuit feeds a PWM driver chip, and the circuitry there will prevent the relay from releasing once it’s turned on. That means if you dim the display, you can’t un-dim it until you turn the rig off.

In this circuit, the 8 V supply is picked off of the original inverter input connector and fed to the DC-DC converter. The output of the converter is set to 12 V or give or take a bit, whatever level gives an appropriate brightness for the LED backlight. The output of the boost converter is connected to the relay coil as well as the relay’s NC contact. The other side of the relay coil is connected to the DIM switch input from the front panel, which is grounded to dim the display and otherwise floats.

Diagram of the new LED drive circuit
The LED backlight modification. After some experimentation, I removed one of the two series diodes.

With the display switch set for full brightness, the relay coil is not grounded and the relay is not energized. Current flows from the DC-DC converter to the LED backlight through the NC contact of the relay, bypassing the diode.

With the switch set to the DIM position (pushed in), the switch grounds one side of the relay coil and energizes the relay. Current now reaches the LED strip through the diode, which provide enough voltage drop to dim the display. Diode choice is not terribly important and can be changed to suit your individual preference for the difference between full brightness and “dim”. You could add a second diode in series if needed. My LED strip draws around 130 mA at full brightness; a 1N4148 would probably do the job as well. I just didn’t happen to have any on hand, which is strange given the thousands and thousands I’ve bought over the years for various kits I sold.

Installation is pretty straightforward. I removed the CCFL tube and slid the adhesive-backed LED strip behind the LCD, then used a piece of tubing I happened to have on the bench to reach through and make sure it was securely stuck down all the way through. A piece of dowel would be good too. I removed the inverter and its connectors entirely – no sense leaving that there with the tube gone. I used CN3, the inverter supply connector, for the ground and 8 V inputs to the boost converter. I soldered the diode assembly directly to the relay, then used some hot-melt glue to stick the relay to the board. The DC-DC converter then mounts onto the relay with more hot-melt glue – just be careful to keep anything from shorting. There’s enough room to sandwich a little spacer of balsa or plastic or something in there if needed. The converter I used has an adjusting pot that I made sure was facing upward, so I could adjust it from the top.

I left the LED strip unsoldered during the initial power-on “smoke test”. I had no idea what voltage the little board would be putting out. It turned out to be 18 V. I adjusted that down to 12 V and powered the rig off. Then I soldered the LED wires in place and powered on again. I tested the dim function and found it to be too dim on that setting, so I tweaked the voltage a bit to give me a good display on both settings. This will depend on your particular LED strip, but in my case I ended up with the output of the DC-DC converter set to 13.3 V. My first iteration of this used two 1N4001 diodes in series; I later switched to using a single diode and reduced the supply voltage to 11.5 V. That gave me about 10.75 on the dim setting, and the display looks great either way.

Now, why so complicated with the relay? Can’t you just use the dimmer switch directly without the relay? Well… sort of. Unfortunately, the way that switch is connected on the little switch daughter board, isolating the pins to use for this is a challenge. I ended up having to de-solder it from the board, cut off a couple of leads, and re-solder it. It’s too much surgery and is irreversible. I ended up buying a replacement from eBay; fortunately, it was relatively cheap, but obviously no new ones are being made, and I wanted to present a solution that involved as little butchering as possible.

Since this is a modification that may confuse someone encountering it for the first time, my plan is to pack up the schematic, a spare boost converter or two, and a spare chunk of LED strip and keep it with the rig. Some day someone else will probably own this transceiver, and they may appreciate not needing to reverse engineer all of it.

And finally, yes, I did see the packaged solutions available from a couple of places. Both are coming from outside the US, with all of the delay and shipping expense (and uncertainty) that comes with it. They’re also pretty spendy. I figure I’ll have under $2 worth of parts wrapped up in this project, and a left-over pile of little DC-DC converters and several feet of LED light strip that will probably soon adorn my 3D printer or something.

The Montpelier

While pondering new ways to enjoy the delicious, pure maple syrup I made myself from our own maple trees, I invented a new drink. I call it the Montpelier, named for the maple syrup capital of the USA. While perhaps not as famous as our cousins to the north, the US does produce its fair share – or some share at least. Vermont is number two in the world in maple syrup production, right behind Canada. I also thought the name was appropriate since the drink is to some degree adapted from the Manhattan.

If you like your cocktails a bit booze-forward, like an Old Fashioned or a Manhattan, this might be your new favorite. It’s not overly sweet, but has enough complexity and rich flavor to make it a solid pick.

  • Two measures of Bourbon (or rye, if you prefer)
  • One measure of sweet vermouth
  • A teaspoon of pure maple syrup. I use my own home-made syrup, boiled down from the sap of the maple trees in my own back yard. If you don’t make your own maple syrup, Vermont maple syrup is preferred over the Canadian stuff. Use what you must, though! Just not that fake garbage you see ten-year-olds pouring over their hotel lobby pancakes.
  • For a properly American garnish, try Peppered Maple-Glazed Bacon. Glaze a strip of thick-cut bacon with maple syrup and a bit of fresh ground black pepper. Bake until crisp, cut into short lengths and skewer it for the rim.

Add all of the ingredients to a mixing glass with ice. Stir until well chilled and properly diluted, about 30 seconds or so. Strain into a coupe, or serve over a large ice cube in a rocks glass.

A Lakeland flirtation

Plenty has been written and said about the so-called Lakeland tobacco blends. These are a group of some fairly heavily flavored/scented flake tobaccos from the Lakeland region of England, produced by Samuel Gawith and Gawith & Hoggarth. The story I’ve read is that artificial ingredients were not allowed in English tobacco, but natural flavorants were – alcohols and flower oils. These tobaccos are fairly heavily topped with what is referred to as “the Lakeland essence”. Pipe smokers seem to either love Lakelands, or hate them. I will admit that in at least some cases, the scent of a Lakeland blend can be a little… unusual. Ennerdale has been compared to “Granny’s panty drawer”, for example.

I’ve tried two different Lakeland blends, Ennerdale and Bob’s Chocolate Flake. Ennerdale does, as people have claimed, have a sort of old-fashioned floral scent to it. Bob’s Chocolate Flake does have a distinct chocolate not to it in the jar. Both are dense, heavy flake tobaccos that benefit from a bit of drying time before loading the pipe and smoking them, as they do tend to be a bit moist.

I may be an outlier, but I neither love nor hate the two I’ve tried. I was a bit disappointed by Bob’s, as I had hoped for at least a trace of a chocolatey not when smoked – and it’s simply not there. The topping lends a distinct aroma to the jar, but does not add a corresponding flavor to the tobacco. There’s definitely a flavor added, but it’s nothing like the aroma of the unlit tobacco. The same goes for Ennerdale – heavily floral in the jar, not so in the pipe.

Maybe my taste buds are just different. For one thing, I can’t say that I really “taste” any tobacco, not with my tongue as with food or drink. Any taste I get from tobacco really comes from exhaling it through my nose, which the online pipe community in their eagerness to come up with oddball quasi-technical terms for everything has called “retrohaling”. Last night I cracked open my jar of Ennerdale and tried a flake crumbled into the bowl of my nice calabash pipe, which I especially love for its cooling and moisture-abating capabilities. [Here the online community is convulsively clutching at its pearls, swearing that this will “ghost” the pipe forever with a floral, soapy taste. They’re idiots.] After months of smoking primarily my own home-made and partially home-grown English and VA/Per blends, I really didn’t find it enjoyable. I may try some Bob’s today, with more drying time, perhaps in a corncob. I’m just glad I didn’t buy some massive quantity of this stuff. I started with two ounces each of Ennerdale and Bob’s Chocolate Flake. Even if I’m not crazy about it, I’ll eventually work my way through it.

Getting back on the air – Part 3

I have a large, L-shaped desk in my home office that served me well for the last decade or so that I was working. I’ve got a pair of computer monitors mounted on a dual-monitor arm, and my old but still quite serviceable PC under the desk. There’s a KVM switch so I can connect another computer and switch between them – I used to just have my work laptop plugged into that. There’s enough room for a pretty good assortment of equipment, once I get al the junk cleared off of it. I’m experimenting with ways to arrange the shack. I have the TS-850 with its matching speaker. Then there’s the FT-817ND; quite useful since it covers not only ham HF but also VHF and UHF to include aircraft and FM broadcast frequencies. I’d also like to bring my Heathkit HW-16 and its matching HG-10B VFO up from the basement. I’ll need a spot for a keyer or two, a paddle or two, a straight key, computer keyboard, mouse, SWR meter, antenna switch, power supplies, a dummy load, and who-knows-what-else. I want to make sure that however I set it up, it’s convenient and ergonomic to operate – that means operate the radios, use the key and paddle for CW, and be able to use the computer keyboard. I don’t know how much (if any) I’ll be operating using digital modes, but I’ll also want the computer for logging contacts and looking up information.

While I work on that, I also have a new call sign. I checked the availability of some “vanity” call signs and much to my surprise found K0DB available! Unfortunately, several people had already submitted applications a few days earlier, and I knew one of them would get it. But – K0DLB was also available, and I got it. So after thirty-plus years as N0XAS, I am now KØDLB.

Getting back on the air – Part 2 (Kenwood TS-850)

I presently own three HF radios. The most capable of the three, the one I plan to use first, is a Kenwood TS-850SAT, which was manufactured in Japan some time in the 1990s. At the time it was at or near the top of their product line; one of the last of the non-DSP radios. It really is a pretty nice rig; maybe not quite as posh as a TS-930, but the power supply doesn’t die every time you look at it sideways.

Unfortunately, after several years sitting in a closet in my office, a couple of the front panel buttons were balky. Also, the display is an LCD backlit with a small CFL tube; as one would expect, either the CFL tube or its power supply is starting to fail, meaning the display occasionally goes blank. Time to take it apart again.

The switches were relatively easy to fix. With the switch board removed, they’re just common 6m square tactile buttons. I replaced the UP and DN buttons – only one was bad, but the new switches have a different actuating force than the originals, and I wanted the button feel to match between the two.

I removed the display panel and found that the inside of the plastic lens over the display was pretty well coated with a grungy tan film of dirt or, more likely, tar from a previous owner’s cigarettes. You can tell where the air flows through the radio by the brown deposits on the parts. It’s not bad bad, but I’ll clean up what I can while I’m in there. I spent a while with some lens cleaning solution, Q-Tips, and a microfiber cleaning cloth getting that cleaned off again.

While I had the radio apart waiting for the LED strip, I checked the DDS chips – these are Direct Digital Synthesis chips that generate the various frequencies used by the radio. Early TS-850s are known for developing problems with the carrier board that these chips are on. Fortunately, mine has the newer part number chips that are supposed to be good and not prone to failure.

The new LED display backlight was relatively straightforward. With the strip cut and stuck in place, I wired it to the white wire from teh front panel power switch. Too bright. It’s a 12V strip, and the power supply is at least 13.5. After some fiddling and experimenting, I ended up de-soldering the dimmer switch and removing two pins to isolate it from ground. Power now comes from the supply switched line (white wire of the power switch), through four 1N4001 diodes in series to drop the voltage to a good level for a dimmed display. The dimmer switch is wired across the second pair of diodes to bypass them for full brightness — in other words, two diodes for full brightness and four for dimmed. It works quite nicely, and the display is now nice and crisp and easy to read.

I still have no antenna up, but last night with about 8′ of wire strung across my office the receiver seemed to work a well as my FT-817ND receiving the very, very few signals I could hear.

Getting back on the air – maybe – Part 1

I’ve been a licensed ham radio operator, off and on, since about 1981. Early on I learned Morse code and the required knowledge to pass my Novice license test in ’81, and was issued the call sign KA5MSS. I passed the exam while we were living at Fort Sill, OK, but didn’t actually receive the license until we’d already moved to Atlanta for a six-month stint. Living in an apartment with nothing but a Heathkit HW-16, I didn’t get a chance to get on the air. In fact, I held KA5MSS for five years until it expired (and a Korean call sign, HL9CA, for the yer I was in Korea), having never gotten on the air

Later on, in the late 80s or early 90s, I took the Technician exam and was issued a new call sign, N0XAS. I upgraded to General class in 1994, and to Extra in 2002. I’ve operated with that call sign ever since it was first issued, making a lot of contacts. I primarily operated CW (Morse code) and much of that was QRP (using low power, 5 Watts output or less), but I’ve operated SSB (voice), VHF and UHF FM voice, packet, PSK31, and probably a few modes I tried once or twice and forgot about. I never got into contesting.

I could write a book about how I drifted away from operating – though a lot of it involved a new side business developing and selling ham related kits and even a fully assembled Morse keyer. It was nice, but it did eventually consume all of the time and energy I might have devoted to operating. A new steel roof over my attic dipole antenna drove the final nail in the coffin.

I’m hoping to get back in the air before winter sets in, so I’ve been working toward that. I need to get my station set up again, get an antenna up and working, get up to speed on changes to the regulations and operating practices since I was last active, and get my Morse code copy speed back up to snuff – at least 10 WPM solid, preferably 13 or better. More to come.

My own take on Israel and Iran

As irritating as it may be to see Israel initiating attacks on and in Iran, I can understand why they’ve done it (more than once). First you have a theocratic dictatorship that has publicly sworn, for decades, that their goal is to wipe Israel and everyone in it off the map. Then you have that theocratic dictatorship doing everything they can to build a nuclear arsenal… for one reason.

Iran knows that if they want to wipe out Israel as they have sworn to do, they would first need to transit Iraq (good luck with that), and then either Syria or Jordan, or both. That, or cook up some viable sea route. Either way, Israel would have at least days to pick off Iranian assets en route. They would doubtless be quite successful at that, and in the end would probably leave Iran with no viable land or sea forces.

Israel knows and has shown that they can operate in Iranian airspace with impunity. Iran knows it. Iran also knows that they can lob every missile and drone they own or can afford to buy or build at Israel, and the result will be summarily shrugged off. Israel’s Iron Dome air defense system has proven more than capable of rendering mass air attacks from Iran ineffective at best, and it’s got to be getting embarrassing by now.

Iran is still trying to develop its nuclear capability for only one apparent reason: nuke Israel. Israel is unwilling to make the gamble that their Iron Dome system can be 100.0% effective, given that a single nuke getting through would be utterly unacceptable.

So… here we are, and here we will likely remain. Israel is unwilling to allow Iran to build a nuclear weapon, and Iran apparently is unwilling to give up in their quest to nuke Israel. Even if Iran agrees to limit or stop their efforts to do so, no reasonable person would believe them. It’s 100% guaranteed they would continue enrichment in secret, the Israelis would discover those efforts, and the air strikes would begin anew.

Carb and intake

I got the Summit carb cleaned up and rebuilt with new gaskets, seals, fuel valves, and so on. I also got the exhaust manifolds cleaned up, painted gray, and reinstalled. Engine isolators are bolted on, and I ordered a Weiand Street Warrior intake that’s ready to install as soon as I buy some RTV silicone for it. The distributor is rebuilt, re-curved, and ready to go. Now that I have a fresh engine almost ready to run, I suppose I should see about getting a sound car I can drop it into. Just need to pull the transmission and drag it over to the body shop and see how bad the news will be there.

Carburetor score!

I’d been wanting to put a 4 barrel carb on the Mustang’s mostly stock 289. By “mostly stock” I mean I’ve put in a different cam and done some minor head porting – nothing fancy, but they should flow a little better than they did. It’s never going to be a race engine, for sure. So the prospect of dropping over $700 to put a 4V intake and carburetor on it was not terribly attractive to me, and I’d pretty much resolved to just put the old 2-barrel back on it.

A few days ago I saw the exact carburetor I was looking to buy listed on Facebook Marketplace, by a local seller. He said it needed rebuilding, as it had leaked gas everywhere one day and he just replaced it with a different carb. Since there’s not a lot that a rebuild kit won’t fix, I offered him half what he was asking and he took it. So, $75 later I have the carb in hand.

Teardown revealed the likely cause of his problem – the power valve was packed solid with some sort of white flaky crud that I thought at first was aluminum corrosion. If it was, it didn’t come from the carb – there’s no trace of pitting or corrosion anywhere in it. The rebuild kit comes with a new power valve as well as the two fuel valves that were also candidates for being the cause of his problem. For a total of just a bit under $150 I’ll end up with a fresh 4-barrel for the car. I splurged on a new intake for it. There was an intake listed locally also, but it was a no-name – probably some Chinese copy of an Edelbrock manifold that I’d already decided against. I ordered a Weiand Street Warrior. I’m sure I’ll end up needing the odd bit or two for the throttle and kickdown linkages, but I haven’t ordered anything yet. I’ll see what can be taken from the old 2100 2-barrel and reused.

I hadn’t torn down a carburetor for a car in many years, and I don’t recall ever having done a 4-barrel. Most – actually I think all – of the carb rebuilds I’e done were Ford Autolite 2100 2-barrels, which I had on an AMC and a Mustang. There have been no surprises here, and it’s cleaning up nicely while I wait for delivery of the parts order from Summit. With a little more cleaning I’ll be ready to put it back together with new guts.

This one is a Summit Racing manufactured version of a Holley 4010, which was largely based on an Autolite 4100 with some Holley-ish modifications. I like it because it’s got the 4100’s annular boosters and a few other features, but uses a lot of Holley parts – jets, floats, valves, and so on, so parts support is excellent. I think it will work well on the Mustang, despite maybe being a little oversized – 600 CFM rather than the 500 the engine actually needs. But it was readily available, inexpensive, and gives me a little headroom in case I decide later on to swap the heads and exhaust for something that flows better.